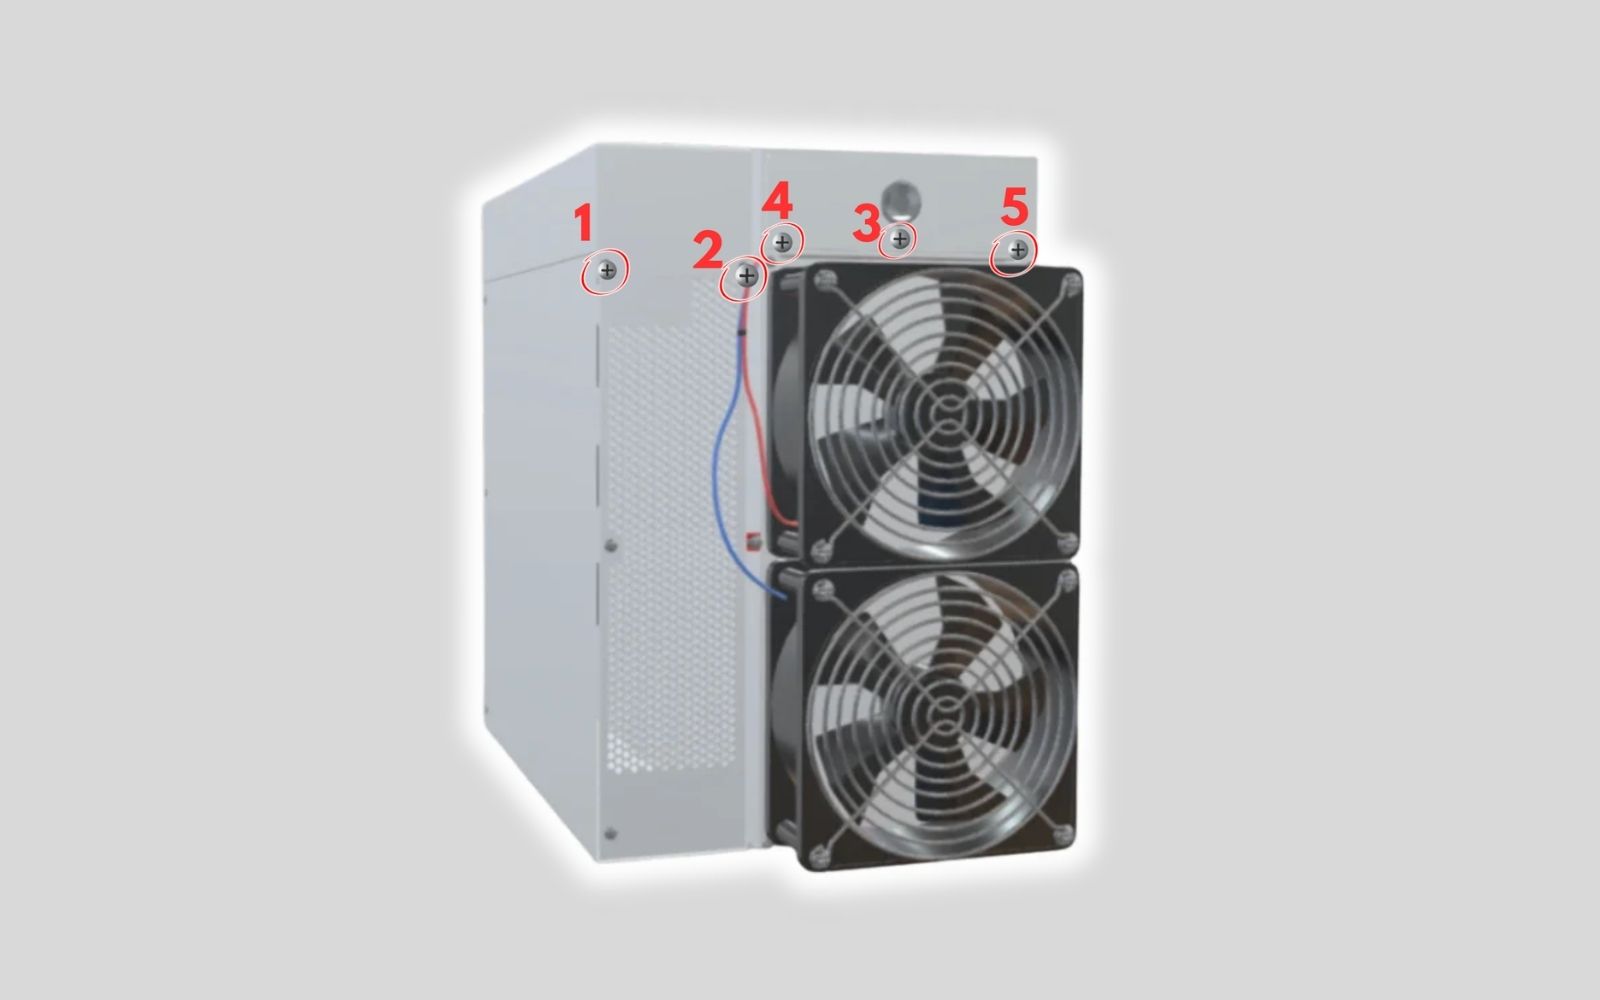
STEP 1
Remove the exhaust-side screws
Unscrew the 5 screws on the exhaust side. For an S21 Pro-series miner, remove 4 screws.
- The removal order does not matter.
- Save every screw for Step 10.
- Screws 1 and 2 provide room to maneuver the fan wiring.
ANTMINER DELUXE SHROUD KIT
A mobile-friendly guide for installing the intake, PSU and exhaust shrouds, removing the stock fans and connecting an inline duct fan.
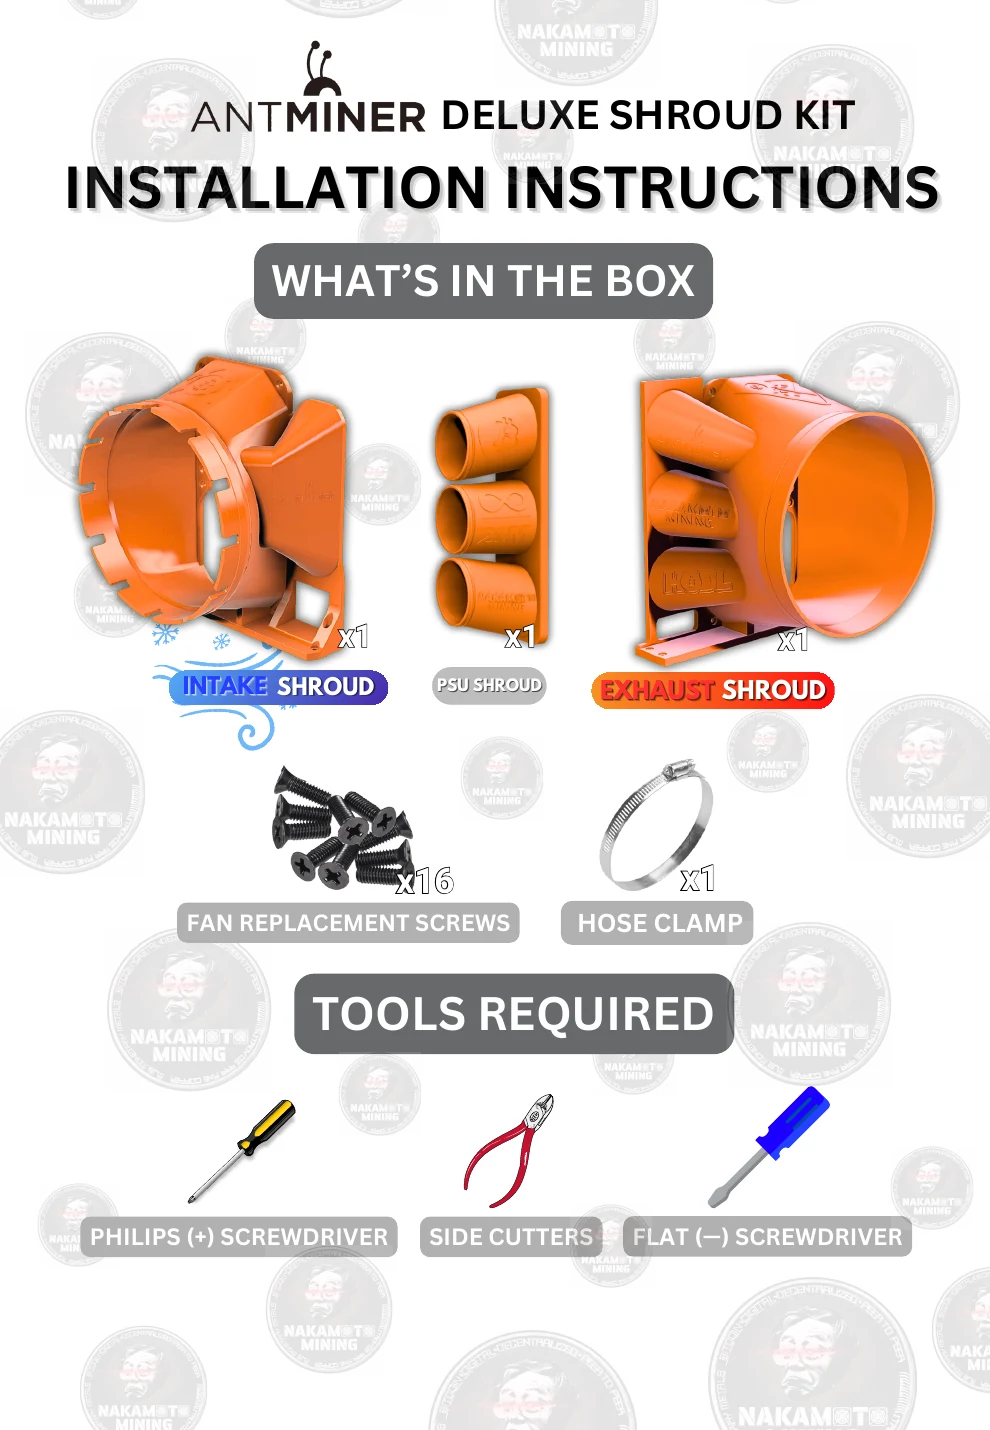
When the stock fans are removed, do not reinstall the original manufacturer fan screws. They are too long and may contact a hashboard, creating a potential fire hazard. Use only the 16 supplied fan-replacement screws.
BEFORE YOU BEGIN
The guide will flag model-specific and optional steps.
INSTALLATION
STEP 1
Unscrew the 5 screws on the exhaust side. For an S21 Pro-series miner, remove 4 screws.
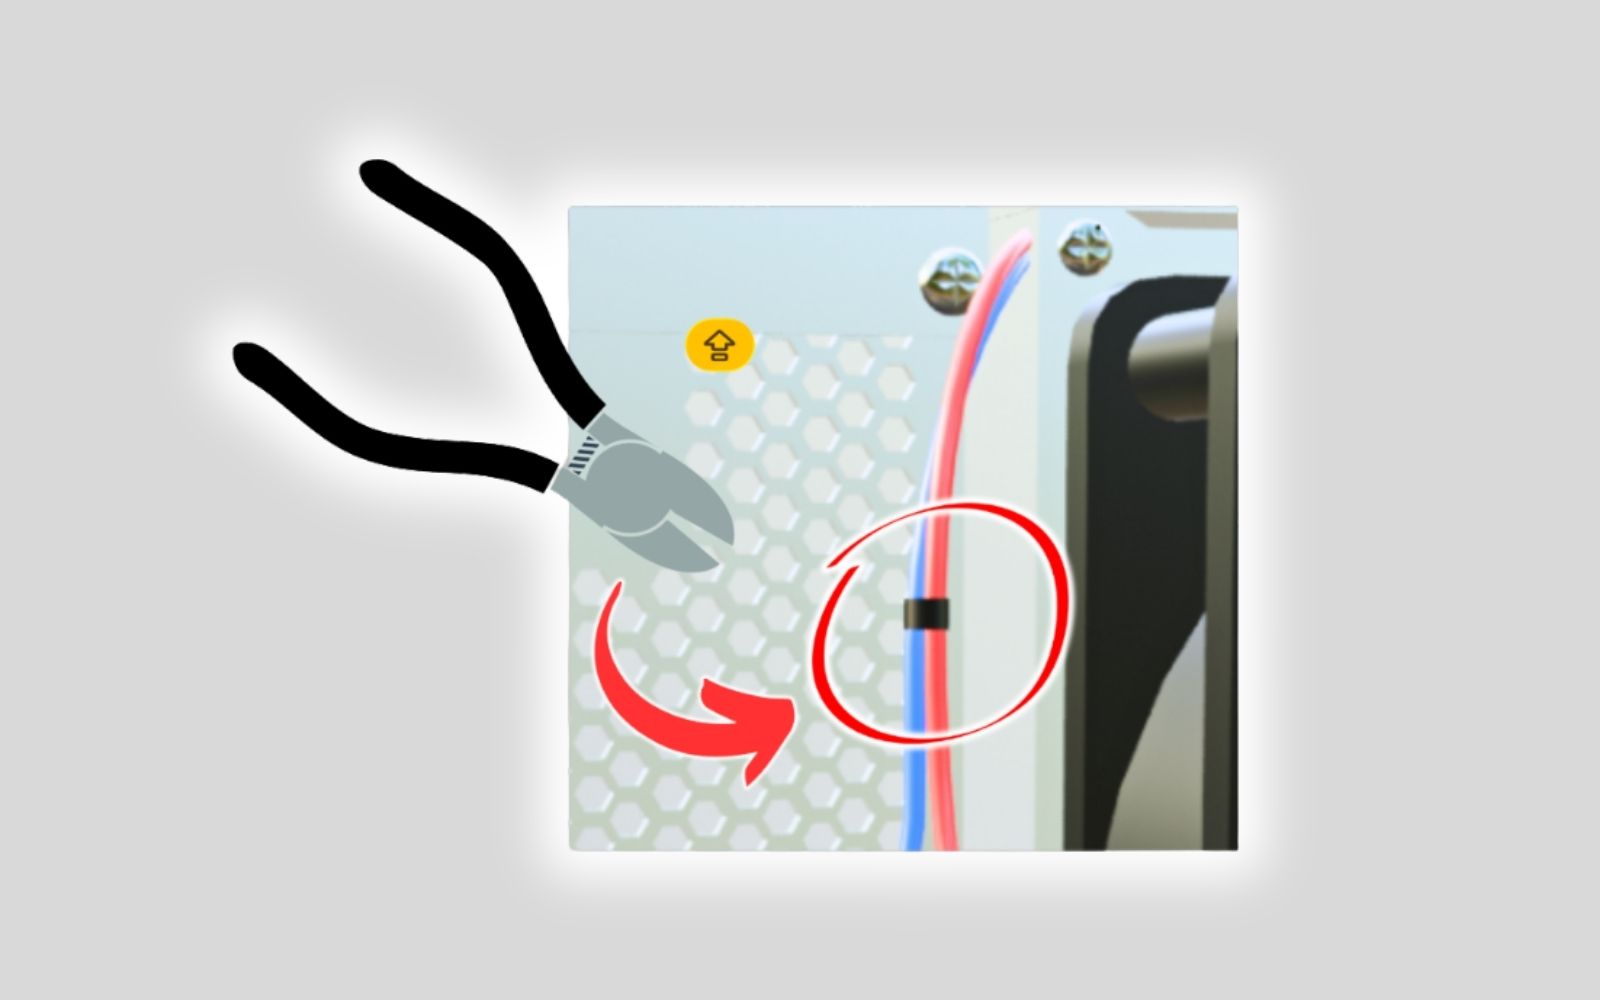
STEP 2
Cut any zip ties holding the fan wiring together. There are normally no more than two or three.
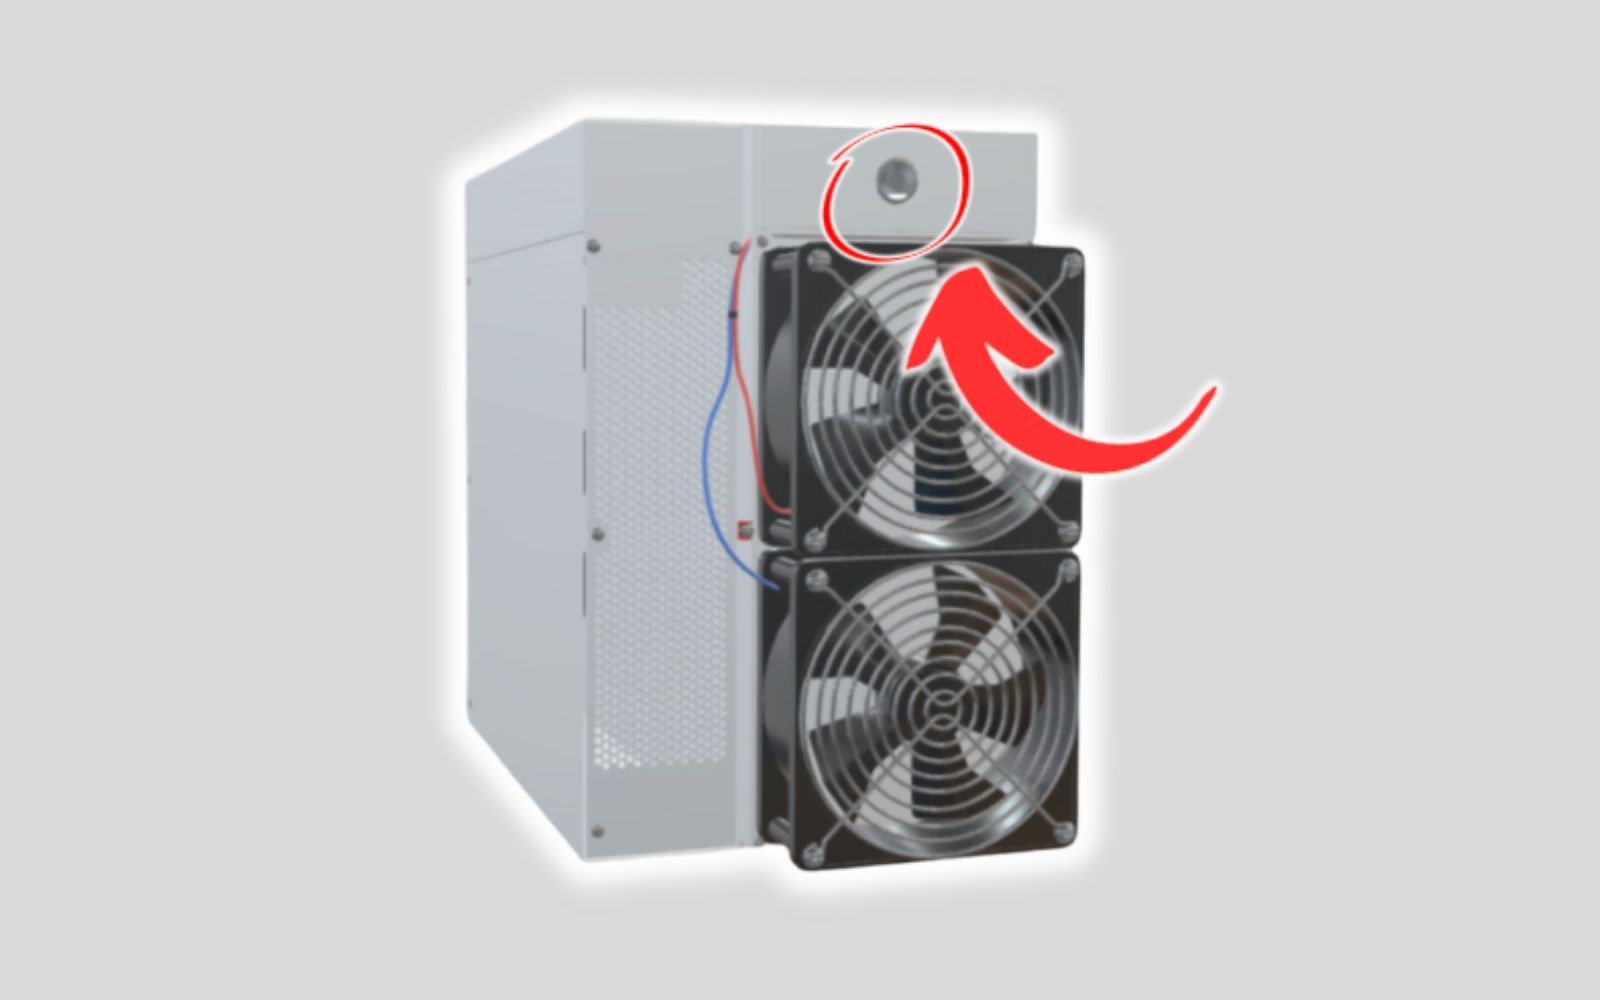
STEP 3
Press and lift the control-board release button on the exhaust side, then pull the top cover toward you so it lifts free.
Not applicable to S21 Pro and newer models.
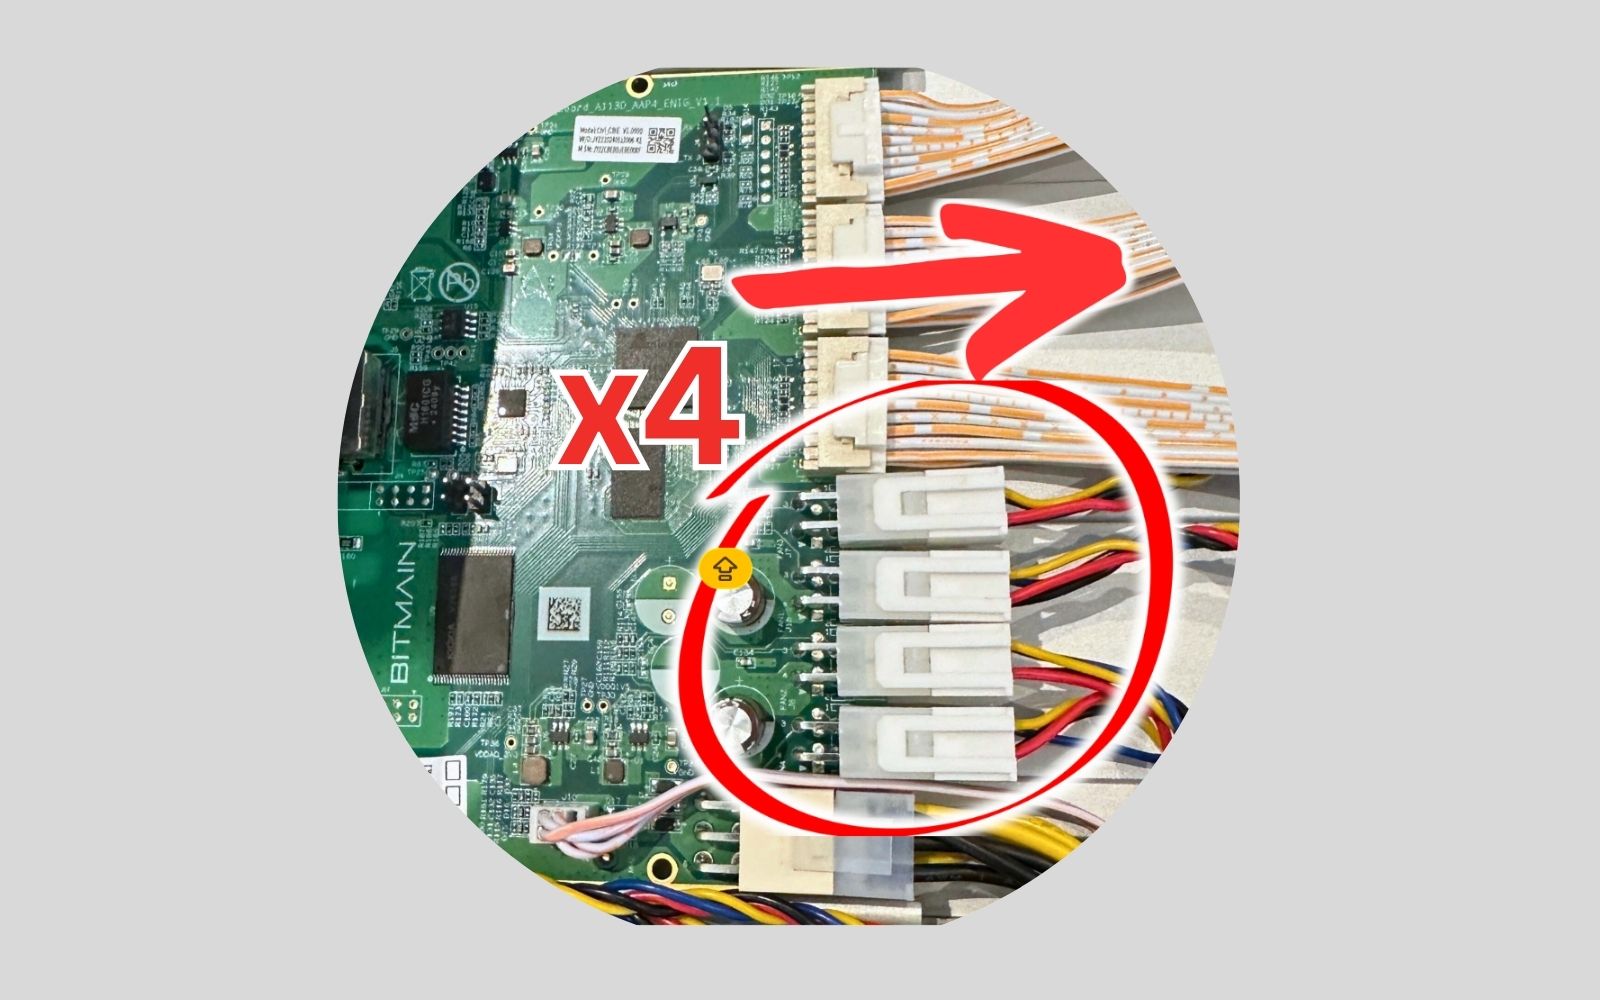
STEP 4 · OPTIONAL
Disconnect all four fan plugs from the control board. Pin layout varies by miner model and manufacturer.
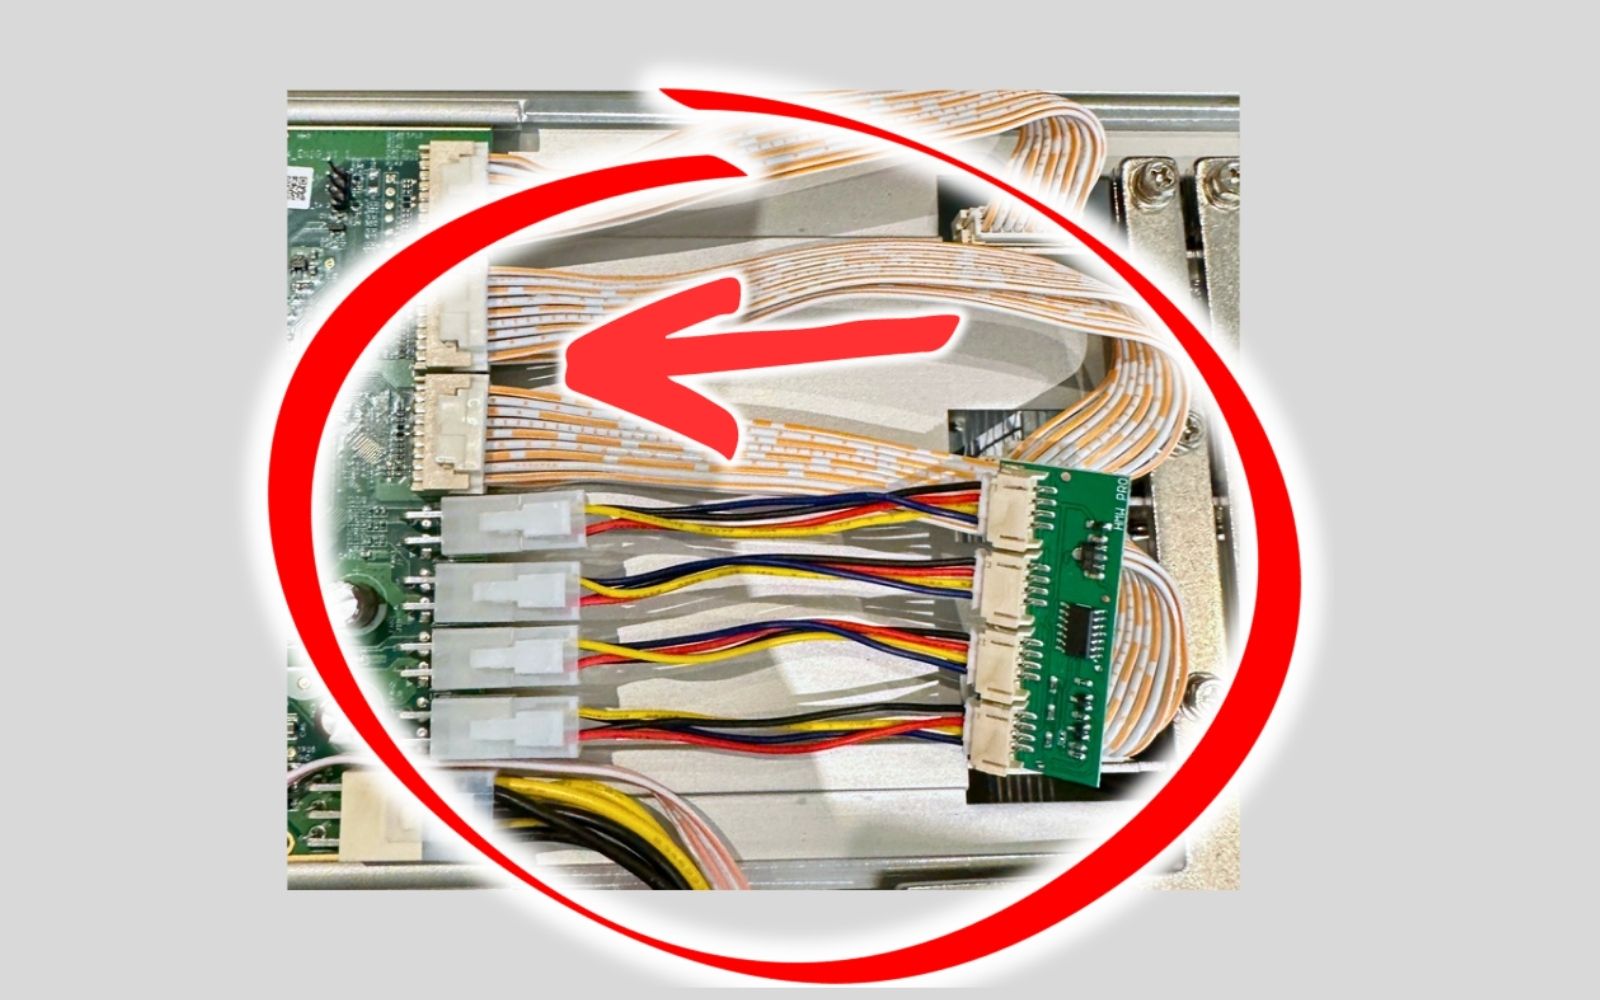
STEP 5 · OPTIONAL
Plug your fan spoofer or simulator into each of the four fan headers. Reinstall and close the control-board cover when finished.
Skip this step with Braiins, HiveOS or LuxOS when fan checks are disabled or immersion mode is enabled.
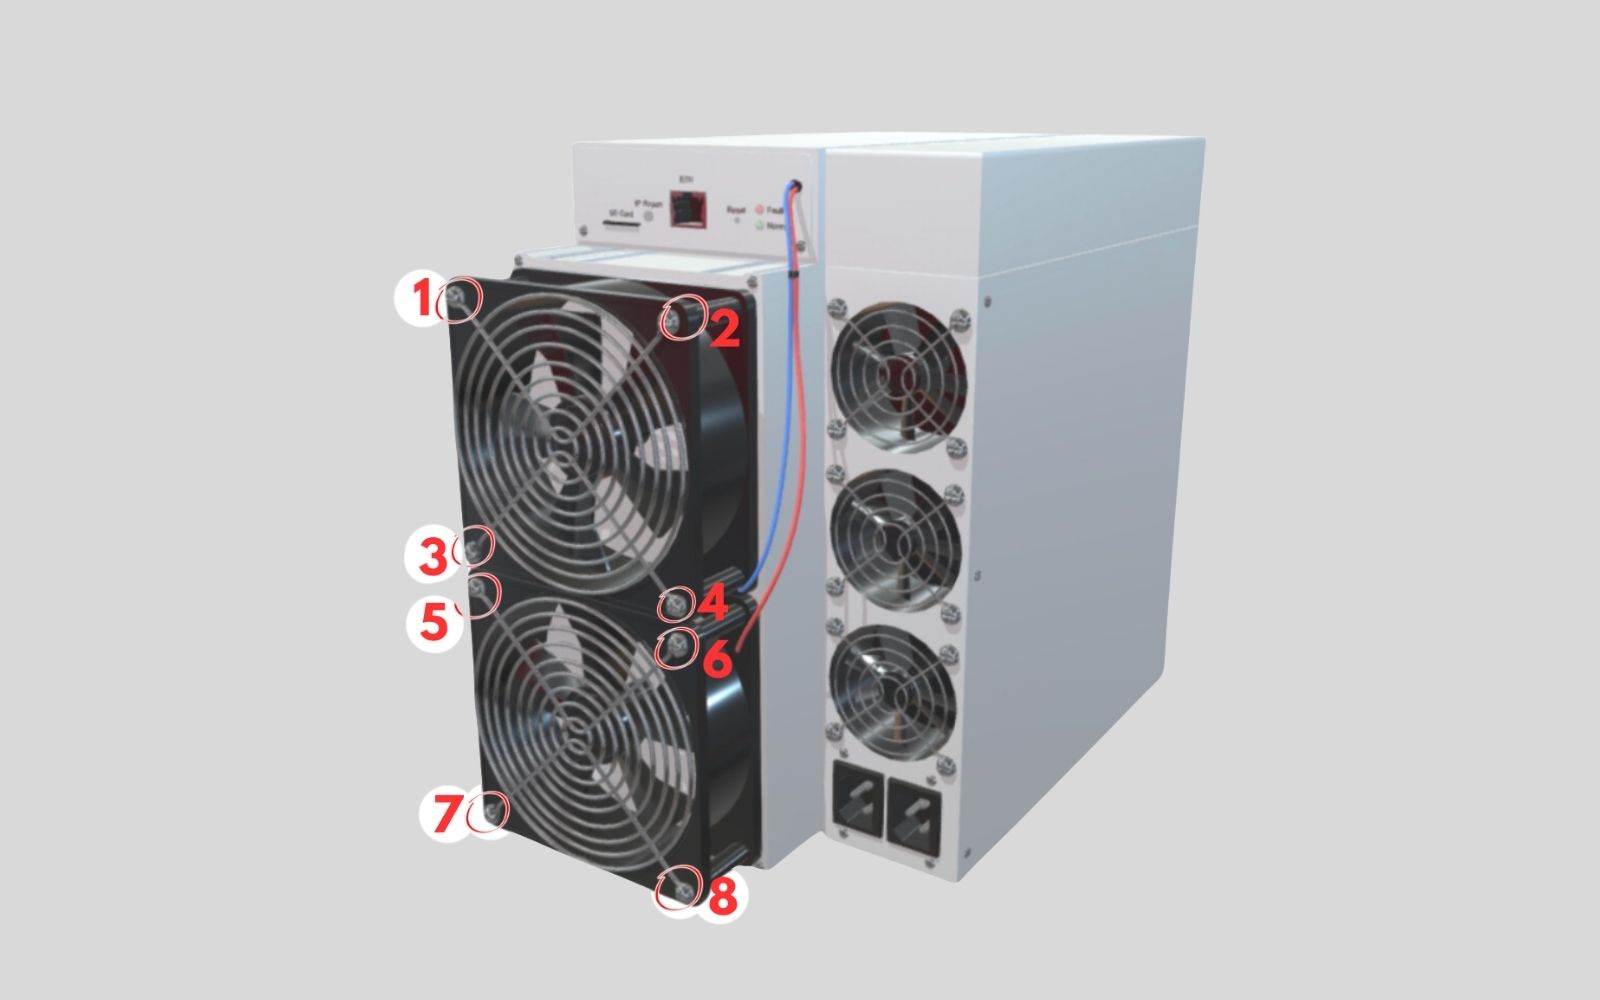
STEP 6
Remove all four fans and unscrew all 16 stock fan screws from the intake and exhaust sides.
Set the four fans and their original screws aside for storage.
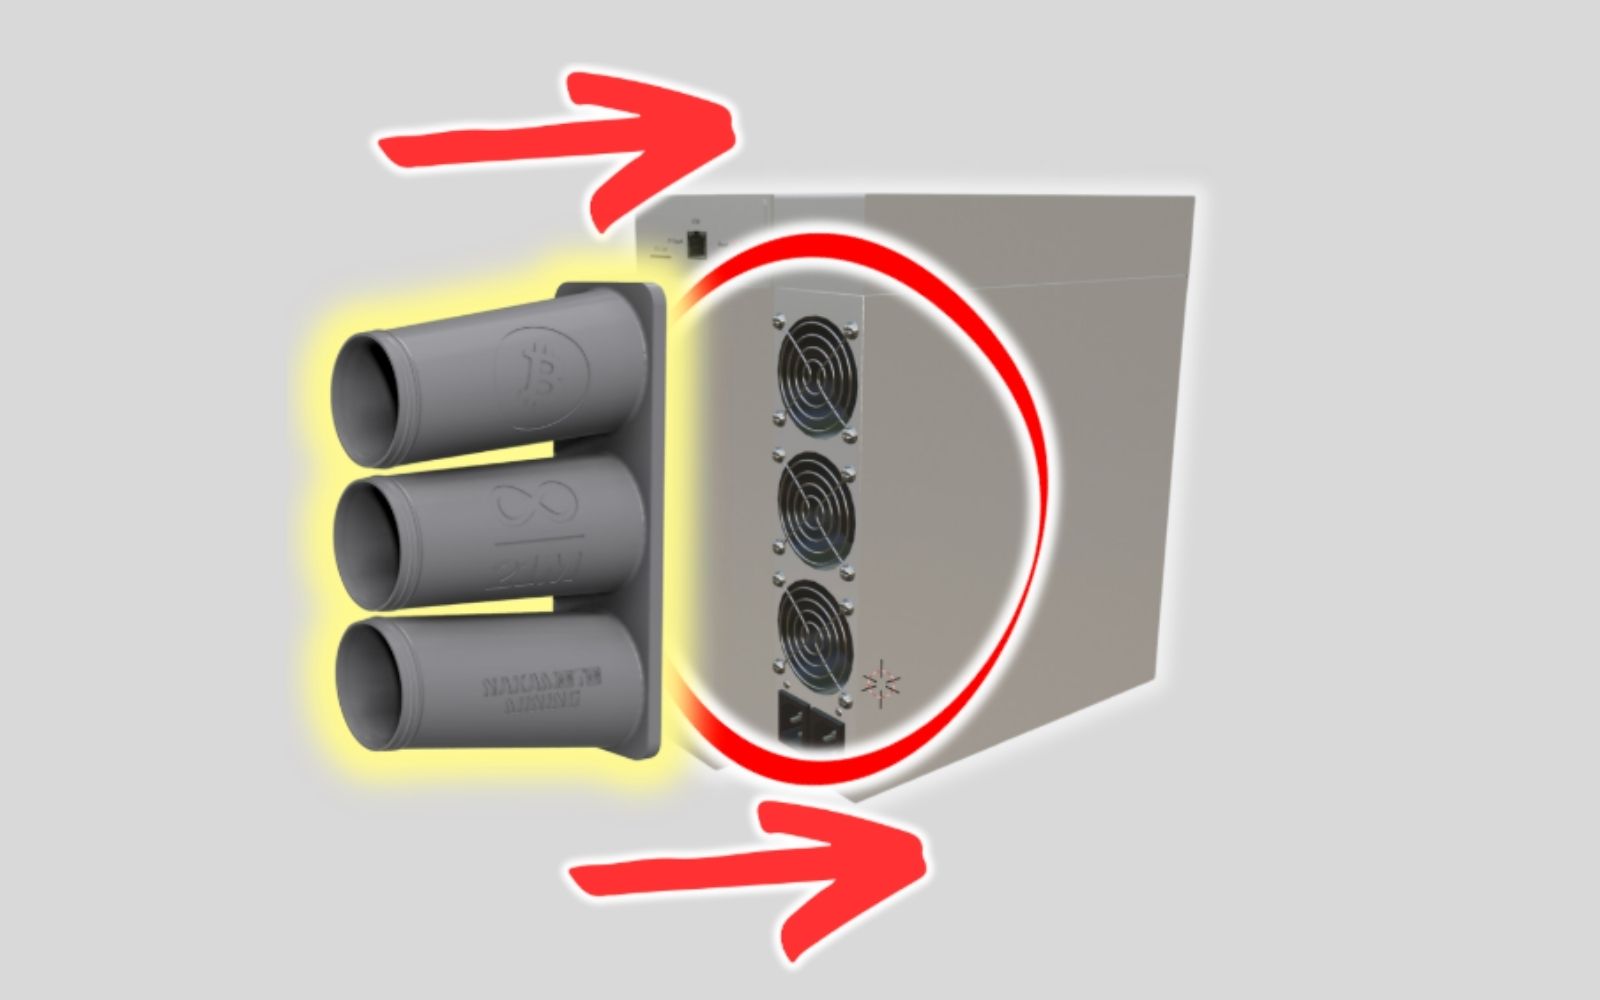
STEP 7
Slip the PSU adapter shroud directly over the power-supply screws.
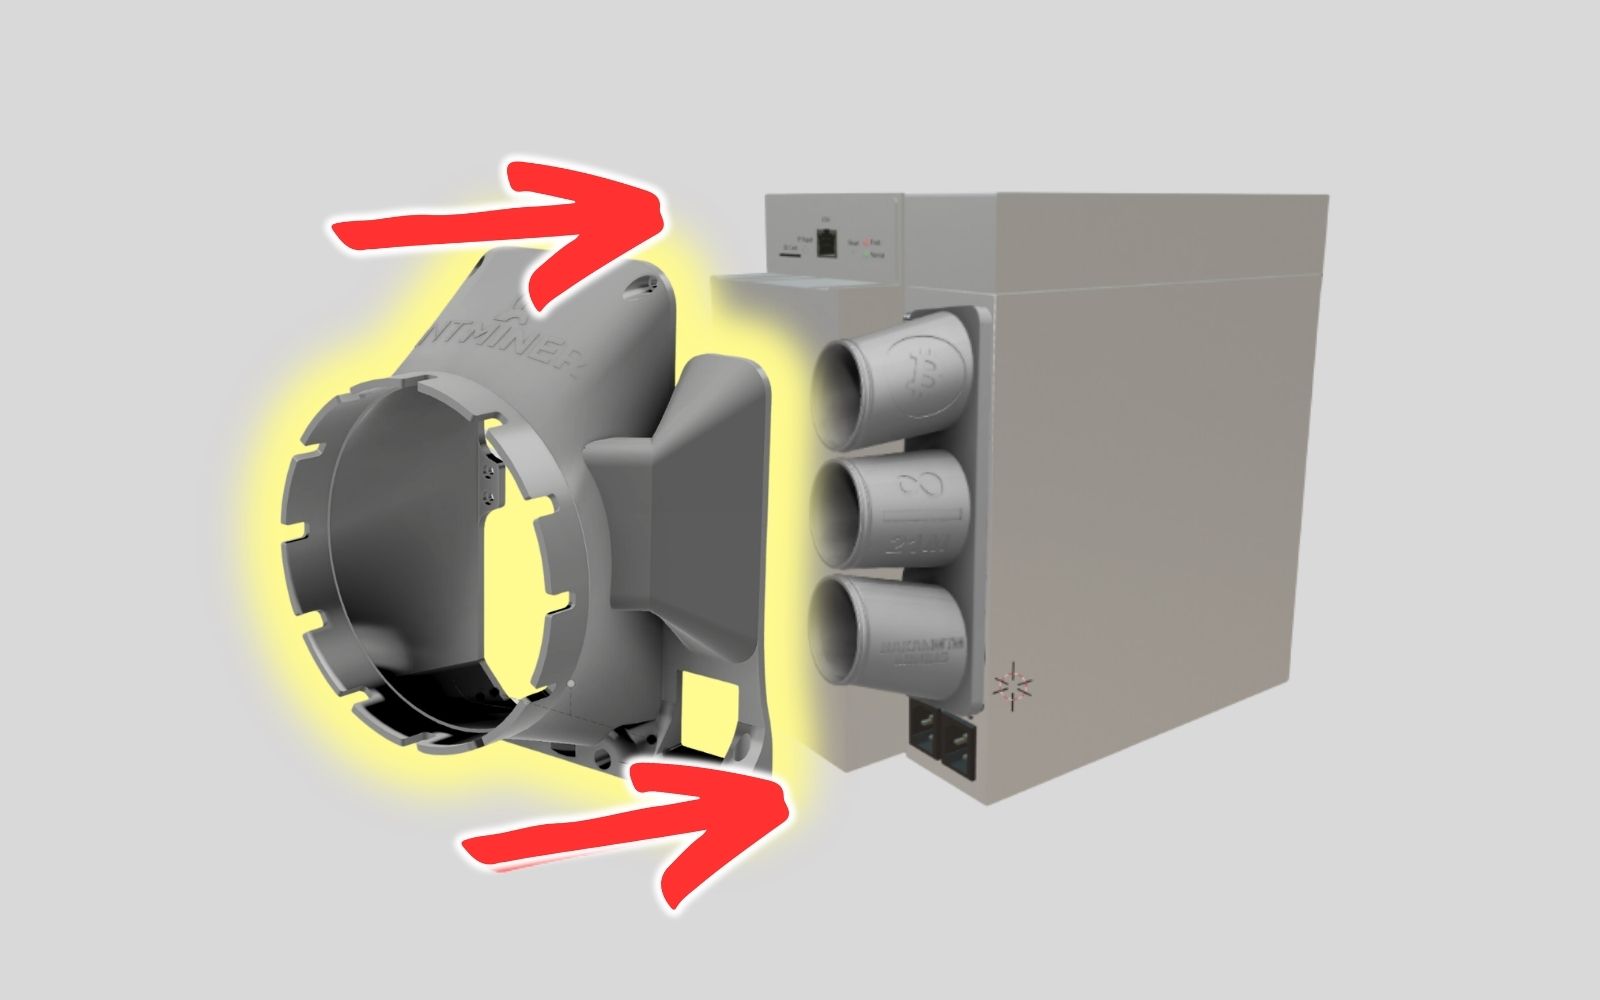
STEP 8
Fasten the intake shroud to the miner using 8 of the 16 supplied fan-replacement screws.
The intake shroud slides over the PSU adapter shroud without additional tools.
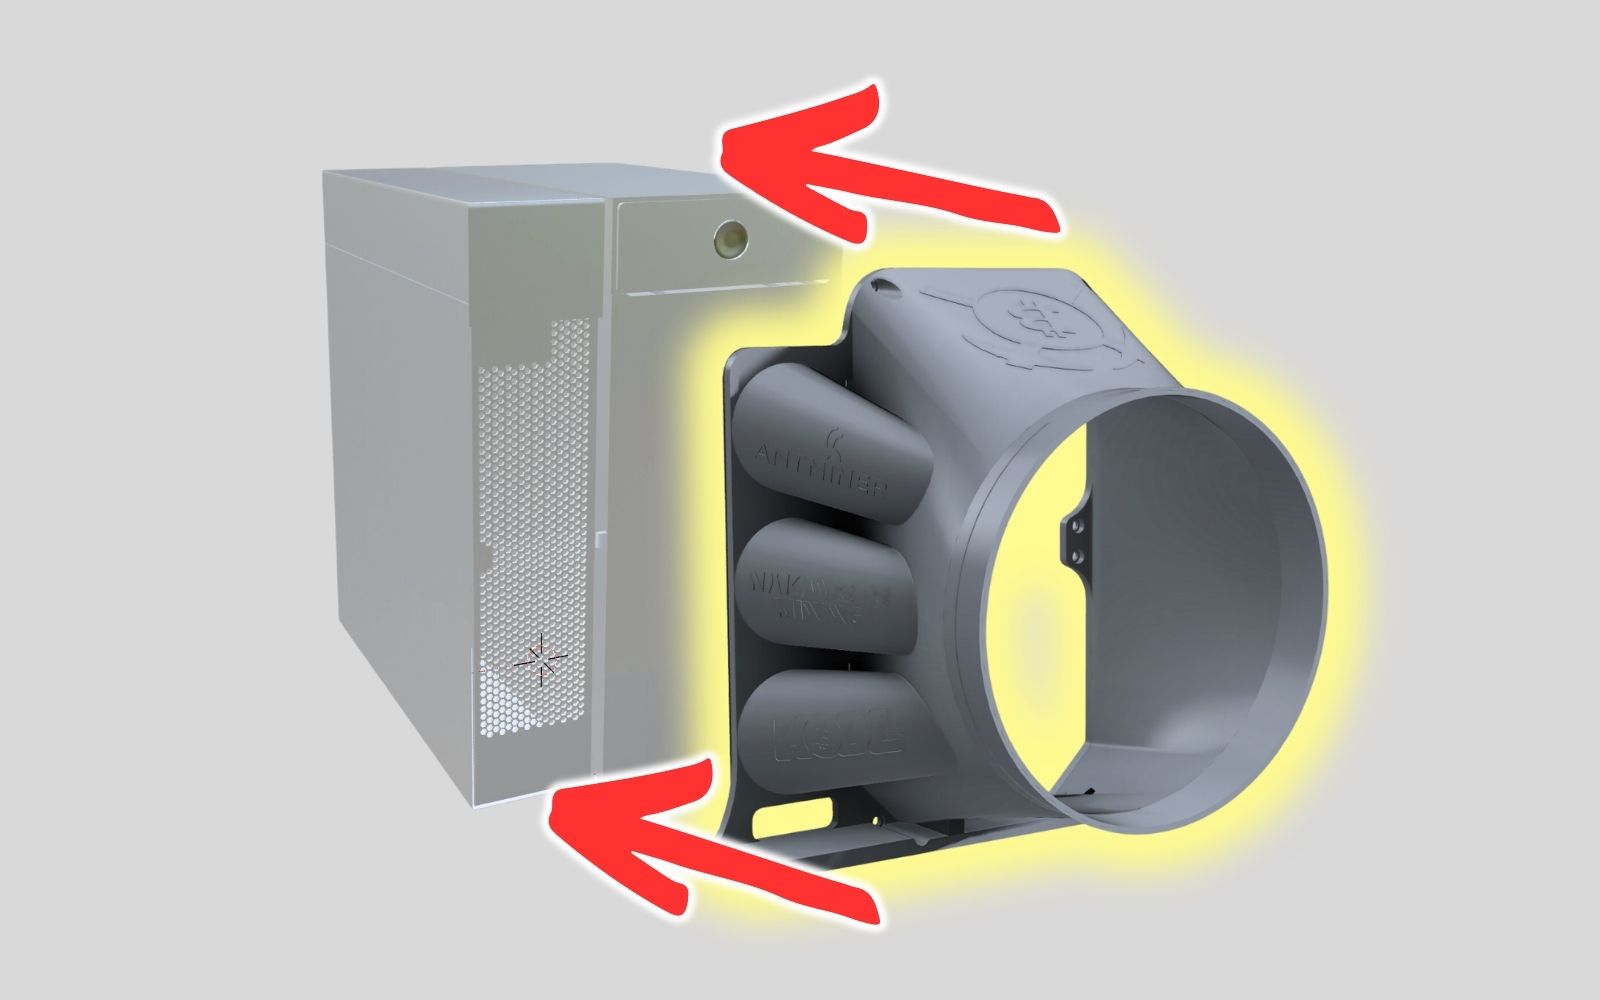
STEP 9
Fasten the exhaust shroud to the miner using the remaining 8 supplied fan-replacement screws.
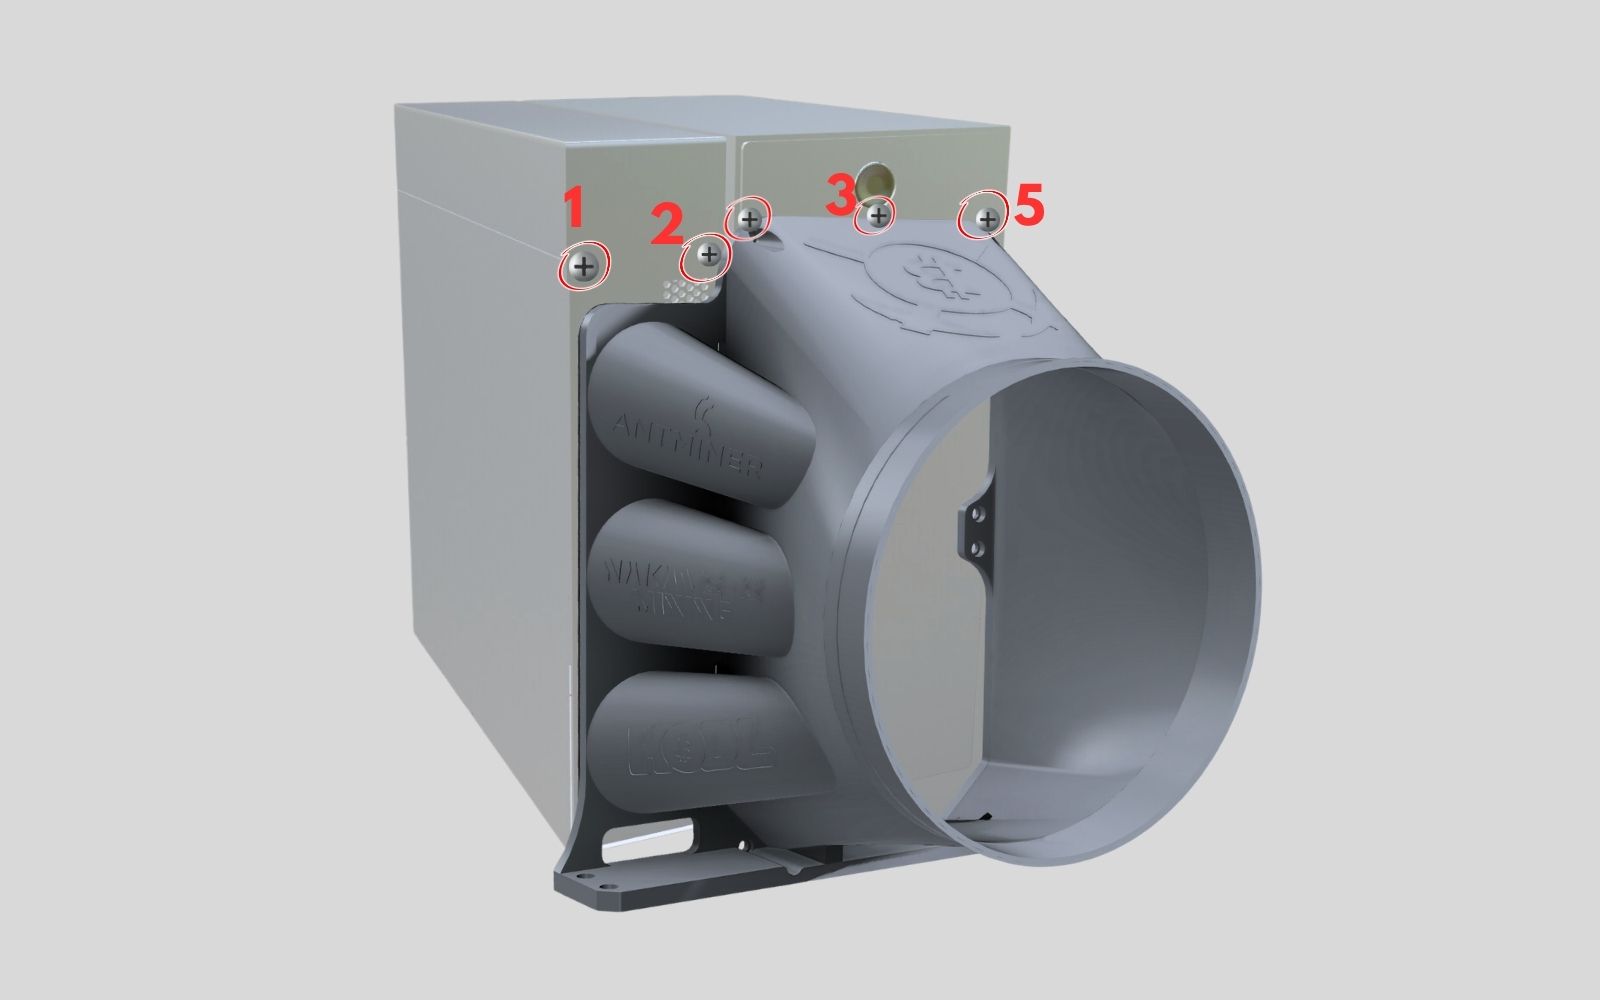
STEP 10
Reinstall the exhaust-side screws removed in Step 1, unless you already reinstalled them during the control-board work.
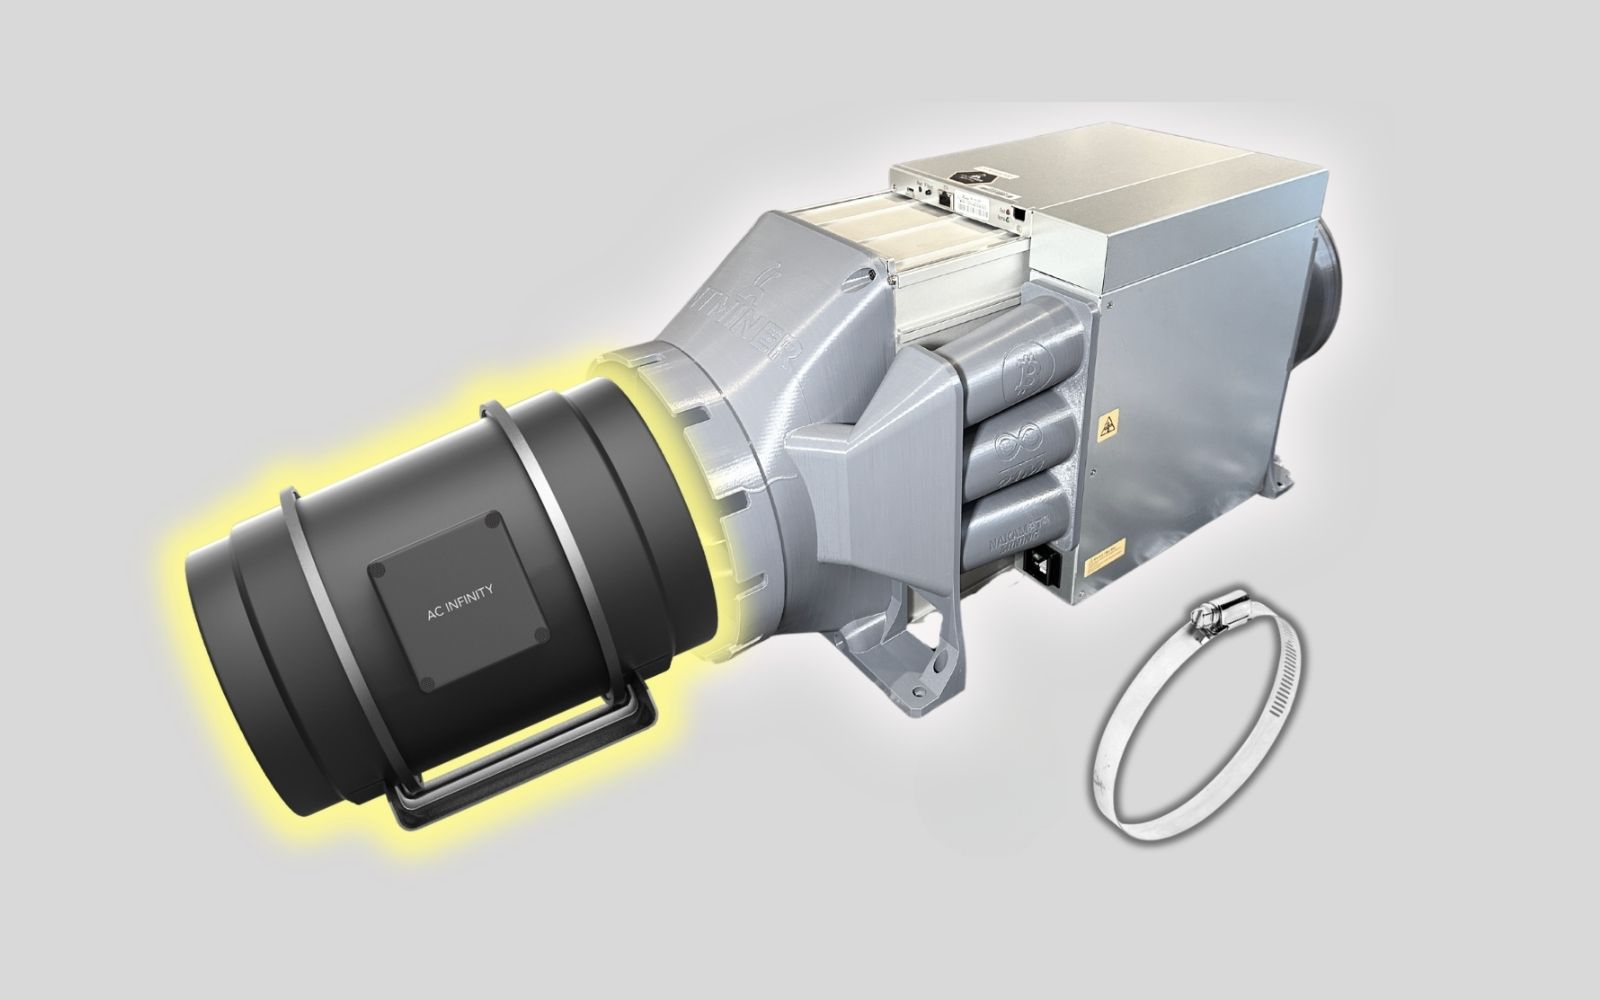
STEP 11
Slide the inline duct fan onto the exhaust shroud, then tighten the supplied hose clamp until the connection is secure.
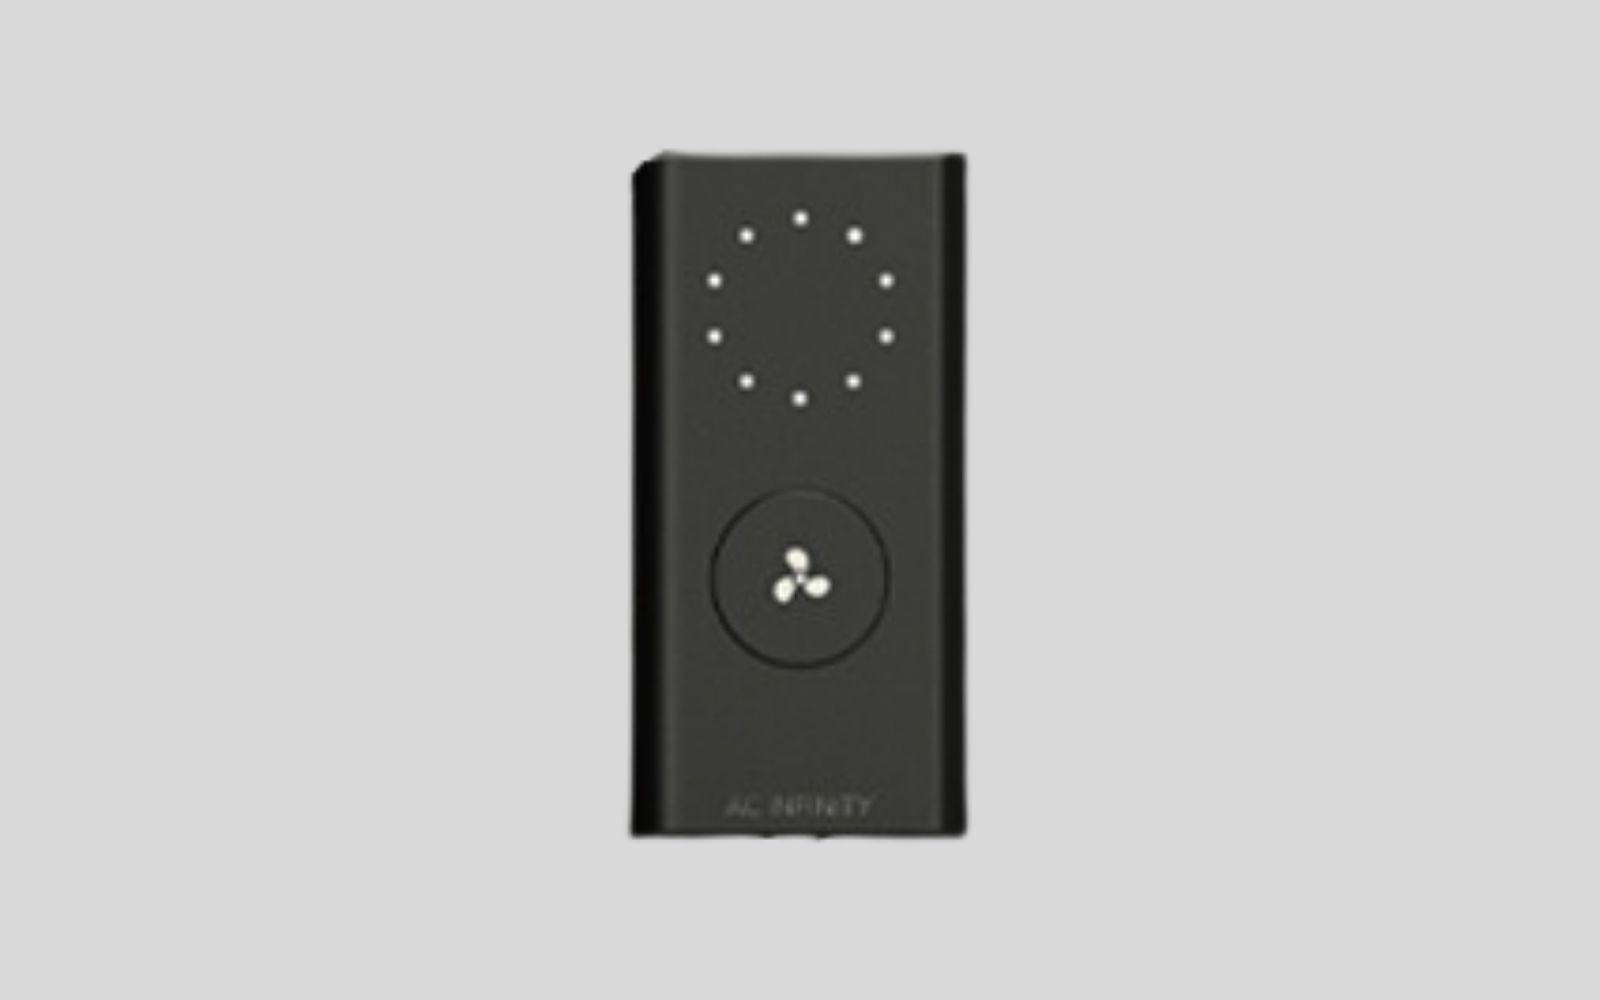
STEP 12 · OPTIONAL
Not applicable to users with a Njord board.
FINAL CHECK
✓ Shrouds are fully seated and secure.
✓ Only supplied replacement screws are used at the fan openings.
✓ Fan-control method is configured.
✓ Inline fan and clamp are secure.